
I have a confession to make. I don't like repetitive stuff. Creating individual artwork for each episode of my podcast digi-what is such a thing. Meanwhile, I can't stand when everything looks the same. I want every episode to have it's own artwork. Motivation enough to invest some time in automation.
In this article, I walk you through how I automated the creation of individual podcast artwork using Transistor (where i host my podcast), Placid and n8n. Just to make things straight from the beginning. It's definitely overengineered and is achievable with less effort. But I am a dev, I love my tools.
Note: I am using affiliate links for some tools mentioned.Prerequisite
- Have your podcast hosted on Transistor
- A Placid account
- A n8n instance (self-hosted or cloud version). Mind the license!
I know it's very specific. You could easily do this using Zapier or Integromat too. There are plenty of great examples to be found at the Placid blog. I was evaluating n8n to use it in our projects. Therefore, I chose the more complex path.
Things you should have in place
- Your Transistor.fm API Key. Can be found in the account settings.
- An API based Placid project. The API Token and an epic template. I'll walk you through this in the next section.
Setting up placid.app
- Create and API project and give it a proper name. e.g.
Digi What - Create a template with at least one dynamic text item (Name the item
Description)
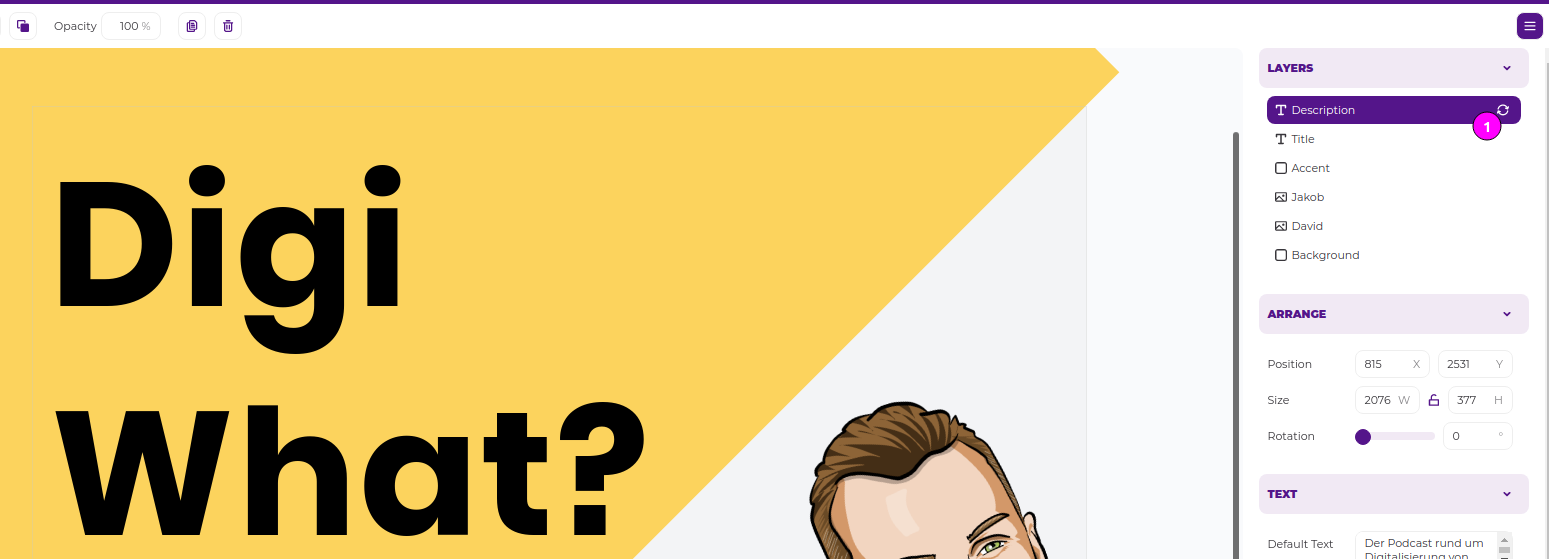 1 Dynamic Text
- Note down the template ID
 1 Template ID
- Get your API token
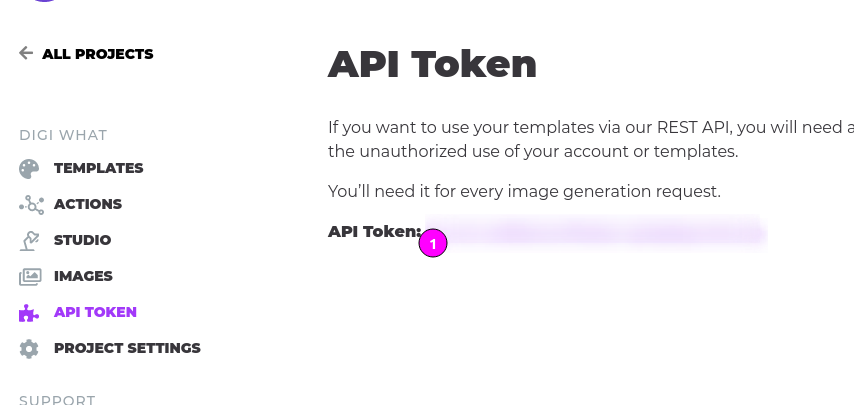 1 API Token
Doing some n8n magic (step-by-step)
We are going to add two webhook nodes, a function node and two http request nodes to the n8n workflow:
- Add a Webhook node and open the settings dialog
- Name it
Transistor Webhook - Set the
HTTP MethodtoPOST - Copy the
Production URL(we need this for the transistor webhook later) - Add another Webhook node and open the setting dialog
- Name it
Placid Webhook - Set the
HTTP MethodtoPOST - Copy the
Production URL(This will be the webhook placid will call when an image was created) - Add a
Functionnode and copy the following code into it
const episodes = items.map(item => ({json: {episode_id: item.json.body.data.id, title: item.json.body.data.attributes.title}}));
console.log(episodes);
return episodes;
- Add an
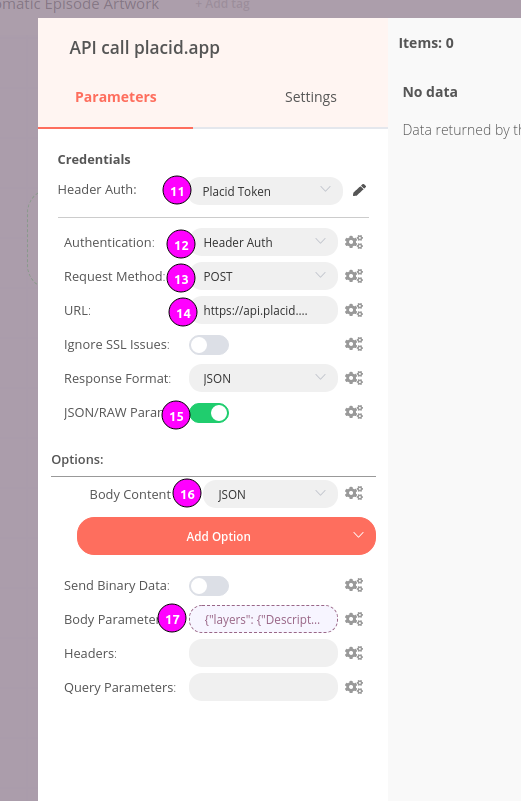
HTTP Requestnode and open the settings dialog
- Under
credentials, add aHeader Authentry for the Placid Token. Name itAuthorizationand set the value toBearer <your placid token>. - Set
AuthenticationtoHeader Auth - Set
Request MethodtoPOST - Add
https://api.placid.app/api/rest/<put your placid template id here>and replace the last part with your placid template id - Activate
JSON/RAW Parameters - Set
Body Content Typetojson - Add this expression to
Body Parametersand add the placid webhooks production URL towebhook_success
{
	"layers": {
		"Description": {
			"text": "{{$json["title"]}}"
		}
		},
	"passthrough": {"episode_id": "{{$json["episode_id"]}}"},
	"webhook_success": "<insert the placid webhoook production URL here>"
}
- Add another
HTTP Requestnode and open the settings dialog - Under
credentials, add a Header Auth entry for the Transistor API Key. Name itx-api-key20. SetAuthenticationtoHeader Auth - Set
Request MethodtoPATCH - Add this expression to URL:
https://api.transistor.fm/v1/episodes/{{$json["body"]["passthrough"]["episode_id"]}}
- Activate
JSON/RAW Parameters - Set
Body Content Typetojson - Add this expression to
Body Parameters
{
	"episode": { "image_URL": "{{$json["body"]["image_URL"]}}"}
}
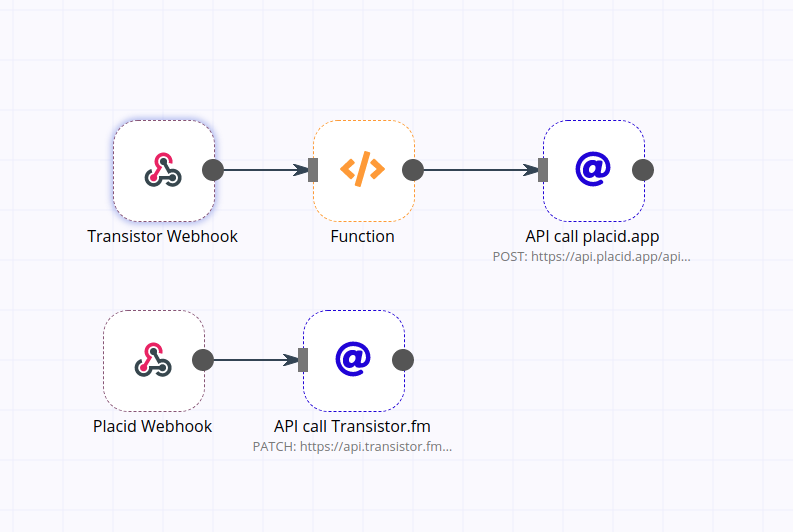
- Connect the Transistor Webhook with the Function node and the Placid HTTP Request
- Connect the Placid Webhook with the Transistor HTTP Request
- Last but not least: Save and activate the workflow
Should look like this now:
Back to transistor for some final steps
We've almost made it. To finish everything up, we need to register the Transistor Webhook. As for now, transistor doesn't have a UI to add webhooks. So we'll have to do it manually.
cURL is required for that (or any other tool to make HTTP requests):
Before we are able to register a webhook we need to get the show id:
$ curl https://api.transistor.fm/v1/shows -G \
  -H "x-api-key: <insert your transistor api key here>" \
  -d "fields[show][]=title" \
Pick the show id from the response for the next request:
curl https://api.transistor.fm/v1/webhooks -X POST \
  -H "x-api-key: <insert your transistor api key here>" \
  -d "fields[event_name]=episode_created" \
  -d "fields[show_id]=<your show id>" \
  -d "fields[URL]=<insert transistor webhook production URL>"
Add your API key and the n8n transistor webhook production URL here.
For more details, have a look at the developer documentation which is really good.
Now, when creating a new episode at transistor, an episode artwork is added after saving. Have some patience, it could take up to a minute for all the calls to go through.
Final thoughts
We are in the midst of a No-Code/Low-Code boom right now. While we had such tools before, they are more powerful, easier to use and more approachable today.
Combined with good API Design, Webhooks and Event Streaming capabilities, most modern (SaaS) apps provide, compelling workflows are possible. Without a giant budget.
Said that, keep an eye open when getting some software custom-made for your business. Good integrations are the norm and should not cost a fortune.